Welcome to our Australasian Blog Hop. We have all been creating with the most lovely paper suite Workshops Your Way® Make Waves Scrapbooking Kit matching complements, stamp sets and ribbon, today. If you have arrived here from Maz Wood: aMAZing Close To My Heart Creations then you are in the right place. If you landed here another way, please join in by following the link at the end of this post. Follow the links, check out all the amazing ideas and eventually you'll come right back here to where you started.
Making Waves Workshop your Way Kit Product Description
Kit contents:
1 – Make Waves Paper Packet (X7227B)
1 – Make Waves Complements (X7227C)
4 – cardstock sheets (1 Pixie, 3 White Daisy)
1 – Make Waves Sequins & Gems (Z4142)
1 – Make Waves Shimmer Trim (Z4146)
printed instructions
1 – Make Waves Paper Packet (X7227B)
1 – Make Waves Complements (X7227C)
4 – cardstock sheets (1 Pixie, 3 White Daisy)
1 – Make Waves Sequins & Gems (Z4142)
1 – Make Waves Shimmer Trim (Z4146)
printed instructions
Use the materials in this kit and the online instructions found on my website to create three coordinating scrapbook layouts.
Make Waves Cardmaking Stamp + Thin Cuts
I made all the pages using the Making Wave Workshop Your Way kit but my photos aren't as nice as the Corporate ones. Only difference was with the left was that I didn't use the graduated paper because most of its hidden and I love it so I saved it for another project.
I made a whole heap of cards for my Online Card Club using the leftover Making waves paper which is exclusive to those people who are registered to receive that so I can't show you those!!
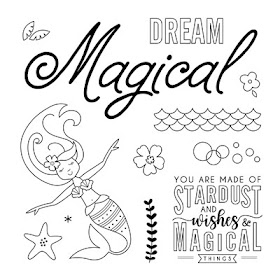
Next I made my daughters birthday invitations using the Make Waves—Scrapbooking stamp set. I LOVE this Mermaid!! My daughter is having a sleepover party and we decided the mermaid looked like she was tired with her eyes shut so all we needed was a pillow. My sister hand-drew the pillows and wrote after the "You're invited to a Party" stamp set (which is a consultant only stamp set) she wrote "A sleepover party!" to match that stamp set. She also coloured in the mermaids all differently.
She then stamped the bubbles in a few generations.
After we had the bases - stamped and coloured in 3.75 x 5 inches white daisy. Using ShinHan markers.
I cut the Gold Glitter Paper (currently on SPECIAL in Feb),
To save my glitter paper, I cut the middle out of it - so I can save it up and use later.
I used my White Cards & Envelopes Value Pack and Tombow® Permanent Adhesive to stick it all together and then Glue Dots® Mini Dots to adhere the mermaids bit to the glitter.
Remember this great Workshops Your Way® Make Waves Scrapbooking Kit is only available while the current Seasonal Expression catalogue is running (Jan 2018-April 2018) from my website or from your Close to My Heart Consultant.
Thanks so much for dropping by to check out my latest project ideas. I'm really interested to hear what you think about them, so I'd love you to leave a comment before heading off to the next stop on our Australasian Blog Hop which is Doreen Watkins.
I hope you leave a lovely comment on all the blog posts and come back around to mine. See you again soon.


Fabulous invitations, they are gorgeous.
ReplyDeleteThanks Doris, that is so kind.
DeleteThe pillows are so clever! Well done!
ReplyDeleteMy little girl wanted pillows for the sleeping mermaid. My artistic sister brought them to life :)
DeleteVery sweet invites! I love the way they are all different!
ReplyDeleteMy sister says its too boring to colour in everything the same... I love how they're all different too. My little girl could choose which friend could have which mermaid.
DeleteThese are so adorable!
ReplyDeleteThanks So much Georgia - I was happy with how they turned out and even more importantly my little girl was happy with how they turned out.
DeleteGreat idea to cut out the middle of the glitter paper!! Cute cards!!! TFS!
ReplyDeleteThanks for stopping by to see our Blog Hop Rene. I hate wasting glitter and bling so I like to stretch it out!! :)
Delete