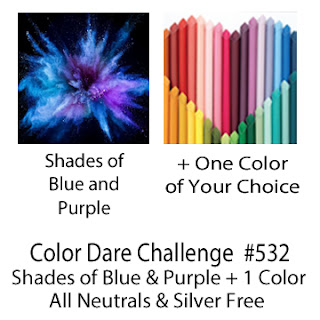
Our Colour Dare Challenge for #532 is a shades of Blue and Purple plus one colour of your choice. You are also free to use all Neutrals and Metallics. When you are creating for more than one challenge please make sure your project meets our requirement. Most importantly - have fun! Go to the link for Colour Dare #532 and add your entry. When you submit your entry you must provide a link to your post, not just to your blog in general. There are LOTS of ways to enter either a Blog Post or post to an online gallery (Facebook, Pinterest or Instagram etc), more details on the Colour Dare Blog post (see link above).
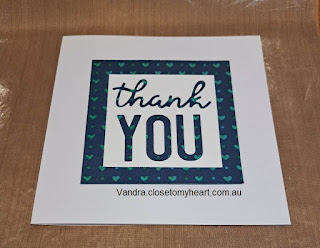
This is what I cut out for my card on the weekend with my For You Thin Cuts and I still had the negative space so needed to not loose the tiny bits so I stuck it down on a piece of scrap blue from my Blue scrap bag. I can't remember what this paper was from. The hearts are a green or peacock type colour and that is my +1 colour.
I cut a 4x4 inch block and stuck my thank you in the middle and then cut a 6x12 sheet of white (folded in half to make a 6x6 card). So I placed in the centre and put a dot in each corner to see where the distress oxides needed to go.
*Note: later I cut it smaller to see more of the sponging.
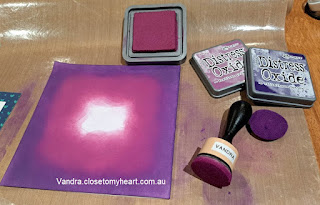
I started sponging with Seedless Preserves Distress Oxides (I think it has now retired from CTMH availability) and did the outside with Villainous Potion Distress Oxide™ Ink Pad (I LOVE the name of this purple).

I alternated with the sponging until it was well covered using my Mini Ink Blending Tool. I have a few of the blenders but accidentally put them back away and couldn't be bothered grabbing another so I kept alternating by pulling off the sponges... This left my fingers very inky like I was playing with mulberries!
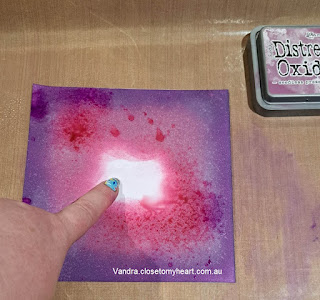
After Sponging I sprayed some water on it and dabbed it off with a tissue so it wouldn't bleed too far.
Below is what it dried like. It looks really red/purple in the photo but the last photo is more what the actual finished product looks like.
To finish off the card I cut down the blue heart paper so you could see more of the central lighter purple colour. Then I raised it up using 3-D Foam Tape.
Then I realised because I had cut the blue piece down you could see the little black dot in top left and bottom right corners so I needed to cover them a little. It might not have been too obvious but I noticed so had to cover it. Keeping with the hearts them and the purples I pulled out my new Purple Dots and popped them to cover the dots in small heart and medium heart. Then added a larger heart "dot" to make a full-stop. I did ummm and arrrrrr about which colour of the purple dots I was going to use. Went middle of the road.

Thanks so much for dropping by to check out my latest project. Hope you can join in the Colour My Heart Colour Dare Challenge #532. I'm really interested to hear what you think about my project, so I'd love you to leave a comment. See you again soon, subscribe to my blog so you don't miss a challenge.
If you don't have a Close to My Heart Consultant (and you're in Australia) feel free to contact me either on this blog or via my website HERE. Vandra Stenton, Close to My Heart Consultant, Perth Western Australia
www.vandra.closetomyheart.com.au


Love your background. Great tutorial. Love your card.
ReplyDeleteLove that you did a tutorial on the background... very pretty card and clean and simple.
ReplyDeleteBeautiful thank you card. I love the ink blended background. The colors are beautiful.
ReplyDeleteLove the background and thanks for the instructions!
ReplyDeleteLove your perfectly placed thin cuts & your background is gorgeous!
ReplyDelete