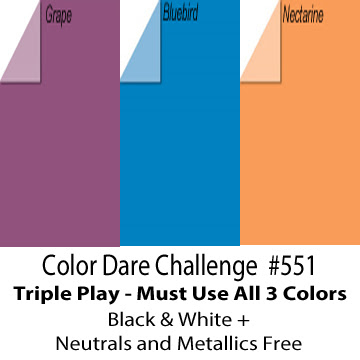
Our Colour Dare Challenge for #566 is a Six Pack challenge. You need to use 3 of the colours from the above picture Plus.... Black, white, neutrals AND Metallics are free to use. When you are creating for more than one challenge please make sure your project meets our requirement. Most importantly - have fun! Go to the link for Colour Dare #566 and add your entry. When you submit your entry you must provide a link to your post, not just to your blog in general. There are LOTS of ways to enter either a Blog Post or post to an online gallery (Facebook, Pinterest or Instagram etc), more details on the Colour Dare Blog post (see link above).
I pulled out my Desert Rose ink pad and my new stencils from the Card Front Stencil Bundle. I need to make some Thank you cards because my Mum was in hospital recently and she had some lovely nurses that looked after her so well we wanted to send thank yous.

I am having fun playing with stencils.

I cut a peice of White Daisy Cardstock cardstock at the same size as a card front 5.5x4.25 inches, and its the perfect size for card fronts. Then I grabbed some old washi tape and taped it down to my All-purpose Mat.
Then I inked it up with Desert Rose Exclusive Inks™ Stamp Pad and a Blending Brush.

To bring in the other colours of the Colour Dare Triple play I decided to add a circle from the
Small Circle Shaker Window Thin Cuts. I cut the backing circle from Sundance Cardstock in the light side and the mini circle frame from Rosemary Cardstock dark side. It looked a little odd against the Desert Rose stencilling until I decided to add some more Rosemary Cardstock to the top and bottom of the white base card. I cut originally at 0.25 inches and it was too wide so I did a 3/8th wide strip and it was perfect.

On the Sundance circle I stamped the Hearts in Desert Rose Exclusive Inks™ Stamp Pad with the new gorgeous stamp set Your Smile Stamp Set
• With every purchase of this stamp set, $7 USD are donated to the life saving mission of Operation Smile™. Operation Smile™ is a non-profit organisation that provides surgeries to repair cleft lips and palates in children around the world.

Over the top of the hearts I stamped in Black ink the Thank you from the current Stamp of the Month Thoughtful Tokens—September Stamp of the Month. It has a cute little Thank You that fits perfectly. I possibly should have waited longer for the desert rose to dry before stamping the black (or use intense black) because it did bleed a little. I didn't re-do it because it did stand out well and I thought that worked okay.

After adhering it all down I stuck the card front to a card from White Cards & Envelopes Value Pack. After editing this photo I realised some of the adhesive was showing on the circle so I went back with my Rub & Remove™ Eraser and removed the adhesive easily.

Thanks so much for dropping by to check out my latest project. Hope you can join in the Colour My Heart Colour Dare Challenge #566. I'm really interested to hear what you think about my project, so I'd love you to leave a comment. See you again soon, subscribe to my blog so you don't miss a challenge.
If you don't have a Close to My Heart Consultant (and you're in Australia) feel free to contact me either on this blog or via my website HERE.