Showing posts with label special. Show all posts

Friday, 12 November 2021

Colour Dare #470 TicTacToe Candid Moments

#CTMHVandra, embossing folders, birthday card, 21st, special, sponging, #CTMHCandidMoments,Gold, glitter, thin cuts, Big Shot,

Our Colour Dare Challenge for #470 is Tic Tac Toe using the Candid Moments Scrapbooking Workshop Kit, you are free to use Black & White. When you are creating for more than one challenge please make sure your project meets our requirement. Most importantly - have fun!  Go to the link for Colour Dare #470 and add your entry. When you submit your entry you must provide a link to your post, not just to your blog in general. There are LOTS of ways to enter either a Blog Post or post to an online gallery (Facebook, Pinterest, SplitCoast Stampers, or Instagram).

I needed to make a 21st Birthday card for a friend and so I pulled out Peach Cardstock and my beautiful new Kaleidoscope Embossing Folder. I put it through and it wasn't showing up enough (too subtle) so I pulled out the Sapphire Exclusive Inks™ Stamp Pad and Round Sponge and sponged the sapphire ink onto the top of the peach cardstock to have the pattern show out. 

#CTMHVandra, embossing folders, birthday card, 21st, special, sponging, #CTMHCandidMoments,Gold, glitter, thin cuts, Big Shot,
Kaleidoscope Embossing Folder

Then I put a section of Peach cardstock across the centre and a small strip of Sapphire Cardstock. I used Gold Glitter Paper and Classic Alphabet Thin Cuts to cut the 21 on my Big Shot machine. The sticker to finish off is "Special Day" shown below from Candid Moments Paper Packet + Sticker Sheet.

#CTMHVandra, embossing folders, birthday card, 21st, special, sponging, #CTMHCandidMoments,Gold, glitter, thin cuts, Big Shot,

I LOVE this new embossing folder. 

#CTMHVandra, embossing folders, birthday card, 21st, special, sponging, #CTMHCandidMoments,Gold, glitter, thin cuts, Big Shot,

#CTMHVandra, embossing folders, birthday card, 21st, special, sponging, #CTMHCandidMoments,Gold, glitter, thin cuts, Big Shot,

Thanks so much for dropping by to check out my latest project. Hope you can join in the Colour My Heart Colour Dare Challenge #470. I'm really interested to hear what you think about my card, so I'd love you to leave a comment. See you again soon, subscribe to my blog so you don't miss a challenge. 

#CTMHVandra, embossing folders, birthday card, 21st, special, sponging, #CTMHCandidMoments,Gold, glitter, thin cuts, Big Shot,
CTMH Sample of the Kaleidoscope Embossing Folder. 


If you don't have a Close to My Heart Consultant (and you're in Australia) feel free to contact me either on this blog or via my website HERE. 

Vandra Stenton, Close to My Heart Consultant, Perth Western Australia
www.vandra.closetomyheart.com.au

Friday, 6 August 2021

Colour Dare #456 Colour Wheel Complementary Colours


#CTMHVandra, Colour dare, gold foil, special, glitter, stitched thin cuts, hearts, #ctmhlovely, colour wheel, #ctmhStarsandSparklers, sponging, retiring, Birthday, Wedding, Anniversary, color dare,

Our Colour Dare Challenge for #456 is an Colour wheel complementary colours (opposite sides of the colour wheel), you are free to use Black, White, neutrals and gold. When you are creating for more than one challenge please make sure your project meets our requirement. Most importantly - have fun!  Go to the link for Colour Dare #456 and add your entry. When you submit your entry you must provide a link to your post, not just to your blog in general. There are LOTS of ways to enter either a Blog Post or post to an online gallery (Facebook, Pinterest, SplitCoast Stampers, or Instagram).

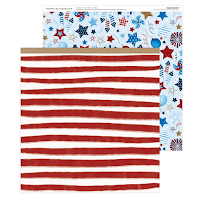
I decided to do a Green and Red colour wheel opposites. I had some red colour striped paper leftover from Stars & Sparklers Bulk Paper Packet and some green scraps from Lovely Paper Packet + Sticker Sheet plus I pulled out the Gold Foil Patterns Paper Packet and put a strip on the top of the card front from the White Cards & Envelopes Value Pack.
#CTMHVandra, Colour dare, gold foil, special, glitter, stitched thin cuts, hearts, #ctmhlovely, colour wheel, #ctmhStarsandSparklers, sponging, retiring, Birthday, Wedding, Anniversary, color dare,
Scrap strip of stars and sparklers (WSL)
#CTMHVandra, Colour dare, gold foil, special, glitter, stitched thin cuts, hearts, #ctmhlovely, colour wheel, #ctmhStarsandSparklers, sponging, retiring, Birthday, Wedding, Anniversary, color dare,
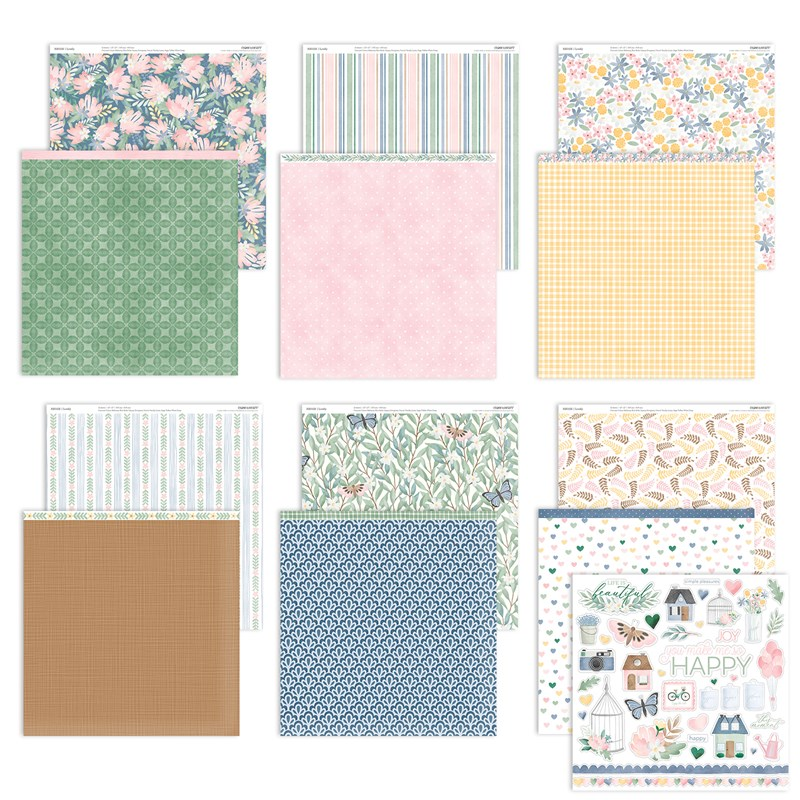
Scrap strip of green Lovely paper (retiring soon)

Small part of gold glitter foil paper (retiring soon)

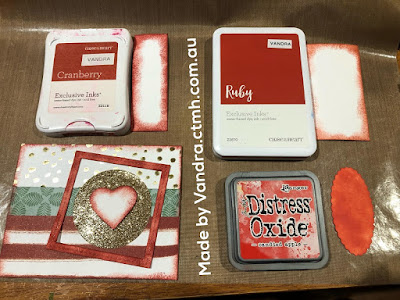
The red in the Stars and Sparklers is scarlet and I didn't have any scarlet ink so I did some colour matching of other reds in my retiring inks. I also tried the Candied Apple Distress Oxide™ Ink Pad but it was too orange-based for Scarlett. I found that Cranberry was the closest to Scarlet (not exact but close enough). I used the old cranberry to ink the edges of the whole card, then I cut a white daisy Stitched Square Frames Thin Cuts 
and sponged all that plus edges of a pre-cut white daisy heart that was in my white scraps.

#CTMHVandra, Colour dare, gold foil, special, glitter, stitched thin cuts, hearts, #ctmhlovely, colour wheel, #ctmhStarsandSparklers, sponging, retiring, Birthday, Wedding, Anniversary, color dare,
I also found a pre-cut circle in Gold Glitter Paper to place inside the square and used 3D foam tape to adhere the heart to the glitter paper. 

I stamped an old sentiment from an old stamp set and cut the white daisy very fine and adhered it directly to the heart. 

I'm sad to see so many of my favourite things go from the annual catalogue but I'm excited to see new things coming 1st September!! 

#CTMHVandra, Colour dare, gold foil, special, glitter, stitched thin cuts, hearts, #ctmhlovely, colour wheel, #ctmhStarsandSparklers, sponging, retiring, Birthday, Wedding, Anniversary, color dare,

Thanks so much for dropping by to check out my latest project. Hope you can join in the Colour My Heart Colour Dare Challenge #456 too. I'm really interested to hear what you think about my card, so I'd love you to leave a comment. See you again soon, subscribe to my blog so you don't miss a challenge. 

 If you don't have a Close to My Heart Consultant (and you're in Australia) feel free to contact me either on this blog or via my website HERE. 

Vandra Stenton, Close to My Heart Consultant, Perth Western Australia
www.vandra.closetomyheart.com.au


Sunday, 20 March 2016

CTMH Australasian Stampaganza Blog Hop


Welcome to our Australasian Close to My Heart Blog Hop featuring every stamp set currently available to purchase for STAMPAGANZA. March is Buy 2 stamp sets and get 1 FREE!!

If you have arrived here from Tanya Armitage-   Happy Papercrafting then you are in the right place. If you landed here another way, please join in by following the link at the end of this post. Follow the links, check out all the amazing ideas and eventually you'll come right back here to where you started.

I decided to use a selection of stamp sets for my blog this hop because there are so many stamp sets available and this is a really great offer. 

I started with Watercolor Paints and painted up some paper with my Paintbrush Set. 
This is my first page by 12" X 12" White Daisy Cardstock (I should have used Watercolor Paper  but I forgot and it worked out okay). 

Then I used some off cuts of 12" X 12" Colonial White Cardstock


Then I used one of the bunnies from the Spring Critters that I cut out using the Spring Critters Thin Cuts on my Big Shot Embossing Machine using 12" X 12" White Daisy Cardstock with Black Exclusive Inks™ Stamp Pad and used my Watercolor Paints and Paintbrush Set to paint him. So cute, using the smallest paintbrush to colour him in. 


Then I decided to paint some free-hand Carrots in a "bunch" to create a Thank You card with a difference. 


I matted the green background I had watercoloured and my carrots with 12" X 12" Slate Cardstock and used 3-D Foam Tape to adhere the bunny in a 3D way. I finished it off with Coral Shimmer Trim.


Next, after my 12" X 12" White Daisy Cardstock page that I had painted with the green edging had dried. I stamped with Black Exclusive Inks™ Stamp Pad and stamped Delightful Ditty musical stamps all over the edge.

I stamped with Black Exclusive Inks™ Stamp Pad over the top of the water colour painting. I LOVE this stamp set. So versatile for a musical family like ours. 


My son is off to his first band camp in a few weeks. So now I have a page all ready. I put the title with the stamp set Handwritten Print and the LOVES it. 


To finish off my last watercolour painting scraps I used the Always Grateful 
stamp set. 
I matted the 12" X 12" Colonial White Cardstock scraps I had painted in purple with 12" X 12" Black Cardstock and stamped on the tree and Black Exclusive Inks™ Stamp Pad. 
Simple and Elegant and I love it. 


With the STAMPAGANZA special you get 1 stamp set FREE when you buy 2. 
During March, buy any two My Acrylix® stamp sets (M-, A-, B-, C-, D-, or E-size) at full retail price, get a third stamp set of equal or lesser value FREE! That is a savings of up to $45.00! Take advantage of this amazing deal by simply adding your selected stamps to your cart!

Remember STAMPAGANZA is only available for March 2016 so make sure you get it soon, so you don't miss out! Go to my website www.vandra.ctmh.com.au and order today. 

Thanks so much for dropping by to check out my latest projects. I'm really interested to hear what you think about what I've made, so I'd love you to leave a comment before heading off to the next stop on our Australasian Blog Hop which is 

  Come back to see me again soon.


Sunday, 24 May 2015

Taste Of Summer - National Scrapbooking Month 2015

May is a great month because its a whole month of celebrations with a special May only Paper Pack and Stamp set called "Taste of Summer". All month long the Close to My Heart Facebook Page, Instagram and Pinterest accounts are all being bombarded with ideas using the Taste of Summer ideas and you can search using the hashtag #CTMHTOS in all the social media arenas. 


May is NATIONAL SCRAPBOOKING MONTH!!!

To celebrate National Scrapbooking Month I attended a 2 night camp at Swanleigh in the Swan Valley with a group of consultants and a whole bunch of our customers. I had a great weekend and spent a lot of time organising my stamps and papers and labelling EVERYTHING... Yes I think I was the only person who went to scrapbooking camp with my label maker but I felt happier having things all organised. I also made a lot of other ideas for future blog posts.


The taste of summer paper pack I have used in my last blog post (Click here for the link)


After I got organised I completed a lot of ideas that I had not finished. The above picture - was a page that my upline had cut for us at our last consultant training day but I had not got around to finishing it. So camp was the perfect opportunity to complete it for us. This used the orange paper from the using the Taste of Summer Paper Pack. The Orange Stamp from the the Taste of Summer Stamp set. The oranges are Goldrush Exclusive Inks™ Stamp Pad and Sunset Exclusive Inks™ Stamp Pad (some are double stamped to get that lighter shade) and the vines with Topiary Exclusive Inks™ Stamp Pad. 
I'm pretty sure the paper is 12" X 12" Sunset Cardstock and I think the green is 12" X 12" Topiary Cardstock - I'm saying "I think" because I didn't cut out the card it was cut for me. 12" X 12" White Daisy Cardstock was cut to go on top. 


This is one of my cards I made using the Taste of Summer Paper Pack. With the Taste of Summer Stamp set. How cute is that strawberry. I used the Hollyhock Exclusive Inks™ Stamp Pad for the strawberries with Topiary Exclusive Inks™ Stamp Pad for the leaves and sentiment. I cut the Silver Shimmer Trim in half on my SureCut™ Deluxe Craft Paper Trimmer using Washi tape to secure it. I used the heart cut with the Cricut® Artiste Collection and 12" X 12" Pixie Cardstock.

It is great value for a paper pack for only $12.95. Go to my website to order your pack and you can get it delivered directly to your door.


Sunday, 1 March 2015

Choose Happy – March 2015 Stamp of the Month Australiasian Blog Hop

Hello and welcome to our Stamp of the Month Australasian Close to My Heart Blog Hop. We have all been creating with "Choose Happy – March 2015 Stamp of the Month " Stamp set. If you have arrived here from  Denise's Blog Scrap, Stamp, Share then you are in the right place. If you landed here another way, please join in by following the link at the end of this post. Follow the links, check out all the amazing ideas and eventually you'll come right back to where you started.
 
Today I would like to share with you my artwork which features the Choose Happy – March 2015 Stamp of the Month  available exclusively throughout March for $27 or for just $5 when you spend $75. 


I wanted to use my Workshops on the Go® Hopscotch Scrapbooking Kit for this months blog hop because its the LAST month that it is available in the current Seasonal Expressions Catalogue and I love this paper and will miss it when it retires.


I had left over paper from when I made the pages from the workshop on the go so I used those, as you get such great value from the Workchops on the Go. I wanted to create a gift tag type card to hold my Base and Bling Jewellery that I've made to give as gifts. So I went to my Cricut Craftroom and my CTMH Cricut® Art Philosophy Collection and found a tag card. Its called Card, Tag 4.


I cut these two on 12" X 12" Flaxen Cardstock from my Hopscotch Workshop on the Go pack. Then cut scraps of the Hopscotch Paper for the front of the card.

On 12" X 12" Colonial White Cardstock offcuts I stamped in Black Exclusive Inks™ Stamp Pad the ruffled edge oval shape and I stretched the square frame into a diamond shape. Close to My Heart My Acrylix® Stamps are stretchable and moldable. My picture below shows the shape of the square and the "diamond" which is the same stamp just stretched on my 3" X 3" My Acrylix® Block .


Then I cut them out with the Non-stick Micro-tip Scissors. I cut out the square to show the difference between the diamond and square (the same stamp).


Assembling all the bits together. I put the diamond and oval shape on the front of the Hopscotch paper using 3-D Foam Tape. Then to adhere the Base and Bling I used lots of Smoothie Striped WASHI TAPE!!


I used it on the front to secure temporarily the front of the necklace and then inside to secure the entire chain inside. With Washi tape it can easily be removed and doesn't leave sticky residue. Then the inside can be decorated with some more colonial white cardstock and some more of the Choose Happy – March 2015 Stamp of the Month.


And here is the finished product. I put the "You're Special" stamp on the bottom of the card to finish it off as a nice gift for a friend.


The base and bling faux gold square was made using Aqua Dots and covering it with Liquid Glass.
The circle was cut from the Base & Bling Dreamer Style Sheet. 

Used in the Base & Bling jewellery in addition to the above listed Style sheet, Aqua Dots and Liquid Glass...
Base & Bling Rhinestone Charms
Base & Bling Dreamer Charms 
Base & Bling Craft Queen Charm
Base & Bling Chain—Faux Antiqued Silver
Base & Bling Chain—Faux Antiqued Gold
Base & Bling Square Pendant—Faux Antiqued Gold
Base & Bling Square Glass Covers
Base & Bling Circle Pendant—Faux Antiqued Silver
Base & Bling Circle Glass Covers


Remember the pretty stamp set Choose Happy – March 2015 Stamp of the Month  is only available throughout March from your Close to My Heart Consultant. 

Thanks so much for dropping by to check out my latest fun project. I'm really interested to hear what you think about it, so I'd love you to leave a comment before heading off to the next stop on our Australasian Blog Hop which is
Wendy Hopper - Expressions of the Heart. See you soon and remember "you're special"!